
Lifesytle
Is Your Parking Lot Safety Audit Missing Underground Assets?


Parking lot inspections often focus on pavement, lighting, and painted markings while overlooking the infrastructure directly beneath people’s feet. Access covers, drainage components, and surrounding soil can create trip hazards or vehicle damage long before a serious surface failure appears.
A useful safety audit should document these underground assets as carefully as visible features. Inspectors need to examine how each cover sits within the pavement, identify signs of movement, and track changes over time. That added attention can reveal maintenance needs that a quick exterior walkthrough may miss.
Common Blind Spots in Exterior Walkthroughs
Routine walkthroughs tend to follow familiar paths between entrances, sidewalks, and parking rows. This pattern can leave utility access points near loading areas, landscaped islands, and property boundaries unchecked. Similar site security blind spots develop when teams rely on standard observation routes without periodically reviewing what those routes exclude.
Create a site map that marks every visible casting, grate, and access point. Assign each asset an identification number, then record its location, condition, and most recent inspection date. Inspect after rainfall when drainage issues are easier to see and again during dry conditions when cracks or loose edges are more visible.
Walk the full perimeter too. A cover located outside the busiest area can still affect contractors, delivery drivers, or maintenance teams.
Settling Soil and Shifting Castings
Soil can settle after trench work, drainage repairs, or repeated freeze-thaw cycles. As the material beneath pavement loses support, a casting may sink, tilt, or separate from the surrounding asphalt. Even a small height difference can catch a pedestrian’s foot, jolt a vehicle, or allow water to enter the base layer.
Look for crescent-shaped cracks, crumbling pavement, and depressions that hold water. Fresh asphalt patches around an older casting may also signal recurring movement. When adjustment or replacement becomes necessary, facility teams can review appropriately sized manhole frames and covers for the application and coordinate the work with qualified infrastructure professionals.
Photograph suspected movement from the same marked position during each inspection. A ruler placed beside the edge gives you a simple visual reference for tracking change.
Evaluating Surface Level Manhole Frames and Covers
Check the entire perimeter of each frame instead of judging its condition from a standing glance. The cover should sit securely within its frame without rocking under normal pressure. Inspect for broken edges, visible distortion, corrosion, and debris that prevents full seating.
Measure the height difference between the casting and adjacent pavement at several points. One side may appear level while the opposite edge has dropped. Document the largest variation and note whether the location serves pedestrians, passenger vehicles or heavier service traffic. Those conditions affect how quickly a defect needs attention.
Never attempt to lift an access cover unless you’re trained, authorized, and equipped for the task. A surface inspection can still reveal movement, damaged seating areas, and pavement failure without exposing underground spaces.
Proactive Replacement Schedules for Facility Safety
Set inspection frequency according to traffic, weather exposure, and repair history. High-use drive lanes and pedestrian crossings may need monthly visual checks, while low-traffic areas can follow a quarterly schedule. Conduct another review after utility work, severe storms, or pavement resurfacing.
Regular inspections should form part of a wider property maintenance plan. Practical facility maintenance strategies help property managers identify wear, schedule routine servicing, and address minor issues before they develop into costly repairs. Applying the same approach to parking lot infrastructure can help teams monitor drainage components, access covers, and surrounding pavement more consistently.
Guidance on parking lot audits recommends documenting hazards and correcting deficiencies promptly. Your records should show the asset number, inspection date, photographs, measurements, and assigned response. Use clear categories such as monitor, schedule repair, and restrict access.
Age alone shouldn’t determine replacement. A stable older component may remain serviceable while a newer one can shift because of poor base support. Repeated patching, persistent rocking, or widening gaps usually indicate that the frame, surrounding pavement, or supporting structure needs a closer professional assessment.
A parking lot audit is most useful when it produces a reliable history of each underground asset. Add access points and drainage castings to the next inspection sheet, then compare new measurements with earlier photographs. That record can turn a subtle change at pavement level into a scheduled repair before it becomes an urgent closure.

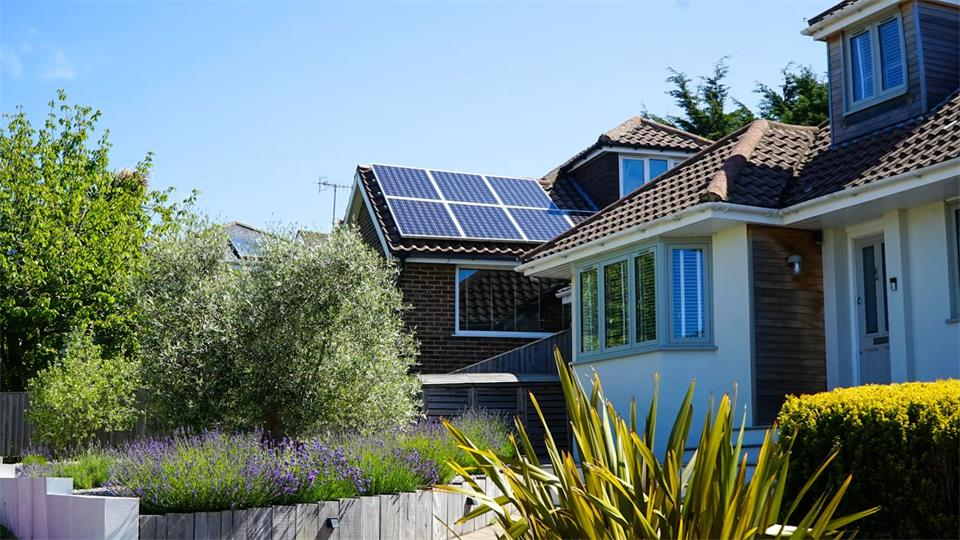
Seasonal power failures can disrupt a property long before an outage becomes an emergency. Heating and cooling equipment may stop, refrigerators can warm and internet connections can disappear. A property prepared for these interruptions has identified its essential electrical loads, selected a suitable backup system and established a clear response plan. That preparation matters during summer heat waves, winter storms and severe wind events that damage local infrastructure.
Extreme Weather Strains Local Grids
Weather affects both electricity demand and the equipment delivering power. High temperatures push air conditioners to run for hours, while freezing conditions increase heating demand. Strong winds, ice and fallen branches may damage distribution lines. This overview of extreme weather grid effects explains how storms can interrupt generation, transmission and local service.
Problems can also spread beyond the area where severe weather begins. Regional grids move power across long distances, so equipment failures or sudden demand spikes may place pressure on neighboring communities.
Review your utility’s outage history and note which seasons produce the longest interruptions. A two-hour summer outage creates different risks from a winter failure lasting two days. That local record provides a practical starting point for deciding how much backup capacity your property needs.
Critical Systems That Need Protection
Start with a written list of devices that must remain available. For most homes, that includes refrigeration, heating controls, a well pump or sump pump, basic lighting, medical equipment and communication devices. A home office may also need a modem, router and one computer.
Record each item’s operating wattage and check for higher startup demand. Pumps, compressors and some heating equipment draw extra power when they switch on. An electrician or qualified energy consultant can confirm these figures and identify circuits suitable for backup service.
Connecticut homeowners considering solar generation and battery storage can explore custom energy solutions based on their property, electricity use and outage priorities. Personalized system design is useful because protecting a refrigerator and internet connection requires far less capacity than supporting heating equipment, water systems and several rooms at once.
Designing Independent Power Backups
A dependable backup plan begins with an energy budget. Multiply each critical device’s wattage by the number of hours you expect to run it. For example, a 100-watt appliance operating for 10 hours uses about 1 kilowatt-hour. Repeat that calculation for every protected load, then allow extra capacity for startup surges and normal system losses.
Solar panels paired with battery storage may recharge during daylight, though production changes with cloud cover, snow and season. Grid charging can help keep a battery ready before a forecast storm. Some systems also let homeowners reserve a set percentage of stored energy for outages.
Plan for extended events as well. Guidance on winter power outages highlights the value of grid resilience and better preparation for prolonged cold. At the property level, efficient appliances, insulation and sensible thermostat settings can make stored power last longer.
Establishing Reliable Routine Drills
Test the backup system before each high-risk season. Confirm that the battery reaches its expected charge, automatic transfer equipment works correctly and essential circuits receive power. Check the manufacturer’s app or control panel for warnings, then update contact details for your installer and utility. Regular checks and proactive measures to reduce unplanned downtime can help identify weaknesses before they interrupt essential operations.
Run a realistic drill for 30 to 60 minutes. Turn off nonessential circuits and operate the refrigerator, internet equipment, lights and any priority pump or heating controls. Record the power draw so you can compare real use with the original estimate.
Keep a simple outage sheet near the electrical panel. It should identify protected circuits, equipment operating limits and the order for reducing demand if stored energy runs low. Include flashlights, charging cables and printed contact numbers in an easy-to-reach location.
Repeat the test after major electrical work or whenever you add a large appliance. A current load list and a successful seasonal drill offer much better evidence of readiness than a battery indicator alone.

Property maintenance works best when every request, inspection and repair follows a clear process. Without that structure, small issues can linger, contractors may receive incomplete instructions, and managers can lose sight of recurring costs. A smarter system connects day-to-day work with accurate records and measurable service standards.
The following steps can help property owners and facility managers reduce delays, control expenses and extend the useful life of building systems.
Audit Existing Facility Workflows
Start by documenting how a maintenance issue moves from discovery to completion. Record who submits the request, who approves the work, how a contractor is assigned and where the final invoice is stored. This exercise often reveals duplicate data entry, unclear responsibilities or approval stages that add several days to a routine repair.
A structured engineering workflow audit can help you examine the digital readiness of related facility processes. Review a sample of 20 recent work orders and note response time, completion time and repeat visits. Speak with the people who use the process daily too. A technician may know that equipment locations are poorly labeled, while an office manager may spot request categories that regularly send jobs to the wrong person.
Standards for Vetting Outside Contractors
Set written qualification standards before an urgent repair forces a quick choice. Your review should cover relevant experience, current insurance documentation, references and the contractor’s process for communicating delays or changes in scope. When comparing home service companies, ask each candidate the same questions so you can judge responses on consistent terms.
Define operational expectations as well. For example, require acknowledgment of urgent requests within 30 minutes and an estimated arrival time within one hour. For planned work, ask for an itemized proposal that separates labor, materials and optional upgrades. A small trial assignment can show how well a contractor follows site access rules, documents completed work and leaves the area ready for occupants. Keep the results in a vendor file so future hiring decisions aren’t based on memory alone.
Track Maintenance Lifecycles Digitally
Use one digital system to record equipment details, work orders, inspection notes, warranties and costs. Practical property maintenance technology can reduce manual handoffs and give managers a clearer view of open jobs. Choose a platform that staff can update easily from a phone or tablet because delayed entries quickly weaken the value of the data.
Create a record for each major asset, including its model, installation date, service schedule and repair history. If a rooftop unit requires three service calls in six months, the record gives you evidence for comparing another repair with planned replacement. Set automatic reminders for recurring tasks such as filter changes and safety inspections. Use consistent status labels too, such as submitted, approved, scheduled and completed, so anyone checking a request understands its position immediately.
Build Long-Term Vendor Accountability
Evaluate vendors through a short scorecard after each assignment. Useful measures include response time, schedule accuracy, invoice accuracy, first-visit completion and adherence to site procedures. The property maintenance management guide offers broader context for organizing maintenance responsibilities and performance records.
Review the scorecards quarterly instead of waiting for a serious failure. One late arrival may be understandable, but repeated delays or unexplained invoice changes indicate a pattern. Share the findings during vendor reviews and agree on a specific correction, such as providing daily updates for work lasting more than two days. Strong performers may earn more scheduled assignments, while contractors who miss documented standards should receive a defined improvement period. This keeps expectations fair, visible and tied to actual results.
A reliable maintenance program leaves a useful trail: every asset has a history, every contractor has measurable expectations, and every completed job improves the next decision. Once that record is in place, recurring failures become easier to spot before they turn into disruptive and expensive repairs.

Many homeowners select flooring on the same basis they choose their paint: a showroom tour followed by the proclamation, “That’s nice. I’ll take it!” The issue with that strategy is flooring decisions have downstream implications on cabinet height, door clearances, subfloor prep, and installation sequencing. In other words, flooring decisions must be finalized before the tear-out begins, lest you pay twice for the same material.
Entryways Need Flooring That Can Take the Abuse
Every renovation has to start somewhere, and in this case should start at the entrance to the property. Entryways and mudrooms get hit with water, tracked dirt, dropped keys, and pet business on a daily basis. As such, a solid hardwood is out as an option due to its susceptibility to moisture and general fragility in the face of heavy traffic.
Porcelain tile or rigid core luxury vinyl plank are much better options for the high-traffic, high-moisture area as both can resist the effects of water damage and are available in wood-look patterns for those desiring to extend a flooring design throughout a home.
Slip resistance in the entry is a huge concern as well, which is why one should examine the coefficient of friction (COF) of any tile being considered for the space. The showroom may make a tile look luxurious and inviting, but it can turn into something of a hazard as soon as it gets wet
If one is considering extending a hardwood floor into an entry, it’s best to stop at a transition strip and then start the next flooring option at the threshold near the front door.
Kitchens Need Flooring Built for Spills and Traffic
After all, kitchens are the grease pits of the home. Whether it’s spilled liquid, greasy splashbacks from the stove, or the dog learning that the kitchen is the perfect place to relieve himself, the kitchen floor is going to endure more than any other room in the house. The kitchen also serves as the thoroughfare to all parts of the house, meaning the floor needs to handle heavy foot traffic in addition to whatever else is dumped on it.
The characteristics to consider when choosing a flooring material for the kitchen are similar to those of the entry in that the floor needs to resist water damage and have a non-slick surface for safety, especially for those in the household with mobility concerns. Porcelain tile and rigid core luxury vinyl plank are much better options for a kitchen due to their resistance to water, stains, and dents.
With vinyl, an eye should be kept on the thickness and clear coat of the top-wear layer (measured in mils), as a lower than 12 mil thickness can lead to excessive scratches and gouges in the flooring. Laminate is tempting in a kitchen scenario because of the lower cost and visual appeal, but it’s a poor choice for the increased likelihood of damage around standing water (the seams can swell if the flooring gets wet).
The core layer of laminate flooring is basically sponge which can retain water, a problem especially around a dishwasher or washing machine.
Bathrooms Put Waterproofing First
It’s rare for a homeowner to choose a bathroom floor based on aesthetics, and it should be rare for a contractor to advise someone to choose a bathroom floor based on aesthetics.
The short version of this is that the bathroom is where water-vulnerable floors get their comeuppance, and as such it’s a good idea to select a durable and easy-to-clean option for the space.
The long version speaks to the reality that a bathroom is the single most humid room in the house, and as such it’s likely to see both accidental spills and water accumulation underneath the toilet if the sealant around it fails (the same goes for around the shower/tub).
The top recommendation for a bathroom floor is porcelain tile installed over a waterproof membrane, as it’s about as close to totally waterproof as one can get with floor covering. However, it’s a cold, hard option for those uninterested in the feel of a five-year-old concrete basement at the end of every day.
Waterproof vinyl plank can be an excellent second choice material for a bathroom (avoid peel-and-stick varieties), as it too is totally waterproof but with the benefit of being more pleasant to bare feet. It’s important to note that any vinyl plank installed in a bathroom should be of the rigid core variety as the flexible planks can easily be lifted at the seams like traditional tongue-and-groove laminate.
Avoid installing either solid hardwood or traditional laminate in a bathroom, as the seams will absorb water and cause swelling. If tile is chosen as the material, time should be allocated to sealing the grout, an oft-overlooked maintenance task. Failure to properly seal bathroom grout is often the reason a five-year-old bathroom floor looks ten years old.
Bedrooms Reward Comfort Underfoot
A plush, cozy floor is the stuff of relaxation in the bedroom, and the feel of it under bare feet after a long day is unmatched. For those unfortunate enough to live in a house where the climate can’t support a beach-house year-round existence, the softness and warmth of a thick carpet are even more appealing.
That doesn’t mean that other flooring options can’t be employed to similar effect, though, especially if the homeowner has allergies and finds that the carpet fibers hold onto pet dander and dust too easily. Hardwood paired with an area rug can offer the same softness without the allergen consequences for some.
Frieze and berber carpets are much harder wearing than plush variants, though, so one should be aware that berber has a lower comfort factor than plush and is more of a traffic floor than a cozy retreat.
The common areas (living room, family room, great room, etc.) tend to benefit most from prefinished distressed hardwood, especially if the space sees a fair amount of foot traffic from kids, dogs, and/or grandparents. Prefinished floors are best in these rooms as the finish will help resist the effects of heavy traffic and power cleaning (both of which are necessary for a space regularly used by a large number of people).
Prefinished flooring in a kitchen is also an option, as long as one doesn’t have large dogs (who can cause dents in the wood during play). Prefinished flooring in the kitchen should avoid the possibility of water getting to the seams, however, as that can cause subfloor damage that may necessitate replacement of the entire flooring.
Oak tends to be the hardwood of choice for prefinished flooring due to its flexibility and forgiving nature. Maple is a harder wood and will show dents more easily, especially in the grain, and hickory has a much more rustic appearance. None of the three woods should be chosen in relative isolation from the rest of the house, as most common rooms are joined to the kitchen and/or entry in most residences, and the three areas need to have a degree of cohesion.
Basements are generally off-limits to solid wood due to the likelihood of moisture exposure at some point during the life of the installation. The options are limited mostly to engineered hardwood and vinyl plank, as both have a much lower likelihood of delamination and swelling.
Tile, too, is a viable option for a basement floor as it’s impervious to moisture concerns completely. Engineered hardwood is made up of alternating layers of solid hardwood and plywood for stability, which reduces, but doesn’t eliminate, the ability for the floor to swell due to moisture. Vinyl plank is totally moisture-resistant and won’t swell or delaminate in the face of water damage.
Tile is an option for a basement if the subfloor (concrete) has been appropriately tested for moisture and cracks, as it is completely waterproof. Radiant floor heating is also an option for basement renovations in particularly cold climates, but an eye should be kept on material restrictions for the heating choice (tile and vinyl can work; hardwood species are often ruled out)
Flooring Choices Affect Cabinets, Trim, and Appliance Clearances
This makes the choice of the floor covering one of the most difficult decision points in the remodeling process, as it’s a large expenditure with little leeway for error
If one goes with tile and decides later to change course and go with vinyl plank, post-cabinet installation, there’s a good chance that appliances like a dishwasher won’t fit in the same manner. It’s critical, when ordering cabinetry and trim, to bring blueprints and/or room measurements to a full-service supplier who can quote materials and installation timing for the entire house.
A company like Wylie Carpet & Tile has the ability to source samples, analyze them in relation to the home’s cabinetry/appliances, and plan out the build in such a way that flooring doesn’t slow down the project unnecessarily.
Rooms need to be considered in conjunction with one another rather than individually.
Plan Connected Rooms as One Flooring System
The presence of a single flooring type, or at least one that uses the same plank throughout, is a huge aid in giving a home a more open feel, especially when considering connected rooms like the kitchen/dining combo or the living room/dining combo. Changes in flooring material require transition strips, which are used in every renovation regardless of an individual’s desire to avoid them.
The more of them present in a space, the more choppy and less thought out the finished work is apt to look. T-molding is used in transitions between two equal-height floors while reducer molding is used in conjunction with lower profile flooring (ex: tile to a thinner planked vinyl plank).
An eye should be given to where transition strips are going to be needed before installation begins, as retrofitting one in at a later date requires some unattractive cutting due to the nature of most planks.
Check the Subfloor Before Installation
Floating floors are a good option for most renovations due to the forgiving nature of the tongues and grooves, but they’re incredibly unforgiving when it comes to laying on carpet or tile. The uneven nature of a subfloor is often exaggerated when a floating floor is installed, making imperfections far more apparent.
Concrete subfloors are often inspected for moisture and cracks before a tile installation can commence while wood subfloors are inspected for levelness before any wood installation can begin. Older flooring is usually not left in place if a new version is going to replace it.
Subfloor leveling or replacement is often a huge expense, accounting for anywhere from 10-20% of the overall cost of a flooring renovation, and it’s the single aspect that’s forgotten by nearly every homeowner when the budget is being planned out. One should get an estimate of the cost beforehand when considering a floor renovation rather than after a large amount of time has been spent shopping at a local flooring store.
Another consideration for homeowners considering hardwood or laminate is the acclimation period, where the flooring is allowed to sit in the house before installation so that it can adjust to the local environment. Skipping this step will often result in expansion gaps or buckling (flooring coming off the subfloor) as the wood expands (from humidity) or contracts (from dryness). This step is often overlooked by DIYers with devastating results.
According to the National Association of Realtors, 91% of buyers prefer homes with hardwood flooring (2018 Remodeling Impact Report). It’s the reason why many homeowners request the material regardless of the room, despite the drawbacks already outlined. In short, it’s the most sought-after option for renovation and is worth considering on a room-by-room basis.
See Flooring Samples in Your Own Space
Showroom photos and lighting are two reasons why a flooring choice might look wonderful at the time of purchase but end up disappointing in the buyer’s home afterwards
Ordering samples of ones’ top choices and seeing them in the space is an important step in the process that should never be overlooked. One should spend time examining the samples in different lighting throughout the day and make sure the best options don’t disappoint on the home front. After choosing finalists, a few days should be spent considering the options before committing.
Pet owners can use that time to make sure one’s hardwood of choice won’t show damage from pet accidents, while more active homeowners can eliminate less durable options from the list of consideration. They should also be sure to avoid higher sheen options for high-traffic areas.
These are all practical matters that narrow the selection without regard to the individual’s personal preferences at the time of selection. After that, the shopping can begin in earnest with the power to choose from competing suppliers and avoid the pitfalls of the showroom.
Check the Plumbing Before the Subfloor Goes Down
The one trade most homeowners forget to consult during flooring planning is the plumber, yet a new floor can bury access to lines that run beneath a slab. If a kitchen or bathroom is on the renovation list, it pays to confirm there are no slow leaks or soft spots under the subfloor before anything permanent gets laid over them. Calling in a trenchless plumber at this stage makes sense because that kind of work locates and repairs lines without tearing up the slab you just prepared, and firms doing slab leak detection can trace a hidden leak to within a few feet before any demolition. Catching a cracked supply line now costs far less than lifting a finished hardwood floor to reach it six months later. It also lets the installation sequencing account for any repair work rather than colliding with it mid-project.
These seven considerations should be made before flooring installation begins so that the remainder of a home renovation can be conducted with confidence and efficiency.

Is Your Parking Lot Safety Audit Missing Underground Assets?

How Business Travel Efficiency Impacts Team Productivity

The True Cost of Warehousing: When Outsourcing Makes Financial Sense

Depreciation Curves Make Pre-Owned Vehicles a Smarter Play

Is Your Property Prepared for Seasonal Grid Failures?

125 Inspirational Car Quotes and Captions to Celebrate Your New Car

188 Deep Hurt Quotes with Images

148 Romantic Love Quotes for Her from the Heart

164 Relationship Goals Quotes for New Couples Expecting a Long Lasting Relationship

185 Cute Boyfriend Quotes for the Guy You Love
-
 Quotes6 years ago
125 Inspirational Car Quotes and Captions to Celebrate Your New Car
-
Growth6 years ago
188 Deep Hurt Quotes with Images
-
Quotes6 years ago
148 Romantic Love Quotes for Her from the Heart
-
Quotes5 years ago
164 Relationship Goals Quotes for New Couples Expecting a Long Lasting Relationship
-
Quotes6 years ago
185 Cute Boyfriend Quotes for the Guy You Love
-
Quotes6 years ago
141 Best Heart Touching Quotes about Love, Life, and Friendship
-
Quotes5 years ago
134 Time Flies Quotes for the Unforgettable Moments
-
Quotes5 years ago
122 Inspirational Kite Quotes That’ll Make You Wanna Fly Right Now