
Home Improvement
How to Choose the Right Flooring for Different Rooms in Your House

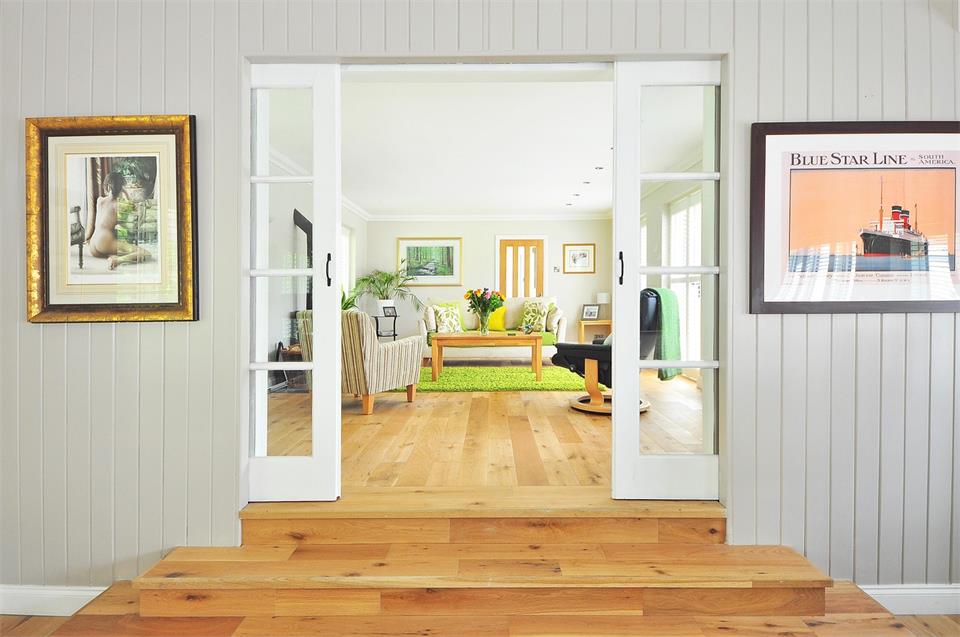
Many homeowners select flooring on the same basis they choose their paint: a showroom tour followed by the proclamation, “That’s nice. I’ll take it!” The issue with that strategy is flooring decisions have downstream implications on cabinet height, door clearances, subfloor prep, and installation sequencing. In other words, flooring decisions must be finalized before the tear-out begins, lest you pay twice for the same material.
Entryways Need Flooring That Can Take the Abuse
Every renovation has to start somewhere, and in this case should start at the entrance to the property. Entryways and mudrooms get hit with water, tracked dirt, dropped keys, and pet business on a daily basis. As such, a solid hardwood is out as an option due to its susceptibility to moisture and general fragility in the face of heavy traffic.
Porcelain tile or rigid core luxury vinyl plank are much better options for the high-traffic, high-moisture area as both can resist the effects of water damage and are available in wood-look patterns for those desiring to extend a flooring design throughout a home.
Slip resistance in the entry is a huge concern as well, which is why one should examine the coefficient of friction (COF) of any tile being considered for the space. The showroom may make a tile look luxurious and inviting, but it can turn into something of a hazard as soon as it gets wet
If one is considering extending a hardwood floor into an entry, it’s best to stop at a transition strip and then start the next flooring option at the threshold near the front door.
Kitchens Need Flooring Built for Spills and Traffic
After all, kitchens are the grease pits of the home. Whether it’s spilled liquid, greasy splashbacks from the stove, or the dog learning that the kitchen is the perfect place to relieve himself, the kitchen floor is going to endure more than any other room in the house. The kitchen also serves as the thoroughfare to all parts of the house, meaning the floor needs to handle heavy foot traffic in addition to whatever else is dumped on it.
The characteristics to consider when choosing a flooring material for the kitchen are similar to those of the entry in that the floor needs to resist water damage and have a non-slick surface for safety, especially for those in the household with mobility concerns. Porcelain tile and rigid core luxury vinyl plank are much better options for a kitchen due to their resistance to water, stains, and dents.
With vinyl, an eye should be kept on the thickness and clear coat of the top-wear layer (measured in mils), as a lower than 12 mil thickness can lead to excessive scratches and gouges in the flooring. Laminate is tempting in a kitchen scenario because of the lower cost and visual appeal, but it’s a poor choice for the increased likelihood of damage around standing water (the seams can swell if the flooring gets wet).
The core layer of laminate flooring is basically sponge which can retain water, a problem especially around a dishwasher or washing machine.
Bathrooms Put Waterproofing First
It’s rare for a homeowner to choose a bathroom floor based on aesthetics, and it should be rare for a contractor to advise someone to choose a bathroom floor based on aesthetics.
The short version of this is that the bathroom is where water-vulnerable floors get their comeuppance, and as such it’s a good idea to select a durable and easy-to-clean option for the space.
The long version speaks to the reality that a bathroom is the single most humid room in the house, and as such it’s likely to see both accidental spills and water accumulation underneath the toilet if the sealant around it fails (the same goes for around the shower/tub).
The top recommendation for a bathroom floor is porcelain tile installed over a waterproof membrane, as it’s about as close to totally waterproof as one can get with floor covering. However, it’s a cold, hard option for those uninterested in the feel of a five-year-old concrete basement at the end of every day.
Waterproof vinyl plank can be an excellent second choice material for a bathroom (avoid peel-and-stick varieties), as it too is totally waterproof but with the benefit of being more pleasant to bare feet. It’s important to note that any vinyl plank installed in a bathroom should be of the rigid core variety as the flexible planks can easily be lifted at the seams like traditional tongue-and-groove laminate.
Avoid installing either solid hardwood or traditional laminate in a bathroom, as the seams will absorb water and cause swelling. If tile is chosen as the material, time should be allocated to sealing the grout, an oft-overlooked maintenance task. Failure to properly seal bathroom grout is often the reason a five-year-old bathroom floor looks ten years old.
Bedrooms Reward Comfort Underfoot
A plush, cozy floor is the stuff of relaxation in the bedroom, and the feel of it under bare feet after a long day is unmatched. For those unfortunate enough to live in a house where the climate can’t support a beach-house year-round existence, the softness and warmth of a thick carpet are even more appealing.
That doesn’t mean that other flooring options can’t be employed to similar effect, though, especially if the homeowner has allergies and finds that the carpet fibers hold onto pet dander and dust too easily. Hardwood paired with an area rug can offer the same softness without the allergen consequences for some.
Frieze and berber carpets are much harder wearing than plush variants, though, so one should be aware that berber has a lower comfort factor than plush and is more of a traffic floor than a cozy retreat.
The common areas (living room, family room, great room, etc.) tend to benefit most from prefinished distressed hardwood, especially if the space sees a fair amount of foot traffic from kids, dogs, and/or grandparents. Prefinished floors are best in these rooms as the finish will help resist the effects of heavy traffic and power cleaning (both of which are necessary for a space regularly used by a large number of people).
Prefinished flooring in a kitchen is also an option, as long as one doesn’t have large dogs (who can cause dents in the wood during play). Prefinished flooring in the kitchen should avoid the possibility of water getting to the seams, however, as that can cause subfloor damage that may necessitate replacement of the entire flooring.
Oak tends to be the hardwood of choice for prefinished flooring due to its flexibility and forgiving nature. Maple is a harder wood and will show dents more easily, especially in the grain, and hickory has a much more rustic appearance. None of the three woods should be chosen in relative isolation from the rest of the house, as most common rooms are joined to the kitchen and/or entry in most residences, and the three areas need to have a degree of cohesion.
Basements are generally off-limits to solid wood due to the likelihood of moisture exposure at some point during the life of the installation. The options are limited mostly to engineered hardwood and vinyl plank, as both have a much lower likelihood of delamination and swelling.
Tile, too, is a viable option for a basement floor as it’s impervious to moisture concerns completely. Engineered hardwood is made up of alternating layers of solid hardwood and plywood for stability, which reduces, but doesn’t eliminate, the ability for the floor to swell due to moisture. Vinyl plank is totally moisture-resistant and won’t swell or delaminate in the face of water damage.
Tile is an option for a basement if the subfloor (concrete) has been appropriately tested for moisture and cracks, as it is completely waterproof. Radiant floor heating is also an option for basement renovations in particularly cold climates, but an eye should be kept on material restrictions for the heating choice (tile and vinyl can work; hardwood species are often ruled out)
Flooring Choices Affect Cabinets, Trim, and Appliance Clearances
This makes the choice of the floor covering one of the most difficult decision points in the remodeling process, as it’s a large expenditure with little leeway for error
If one goes with tile and decides later to change course and go with vinyl plank, post-cabinet installation, there’s a good chance that appliances like a dishwasher won’t fit in the same manner. It’s critical, when ordering cabinetry and trim, to bring blueprints and/or room measurements to a full-service supplier who can quote materials and installation timing for the entire house.
A company like Wylie Carpet & Tile has the ability to source samples, analyze them in relation to the home’s cabinetry/appliances, and plan out the build in such a way that flooring doesn’t slow down the project unnecessarily.
Rooms need to be considered in conjunction with one another rather than individually.
Plan Connected Rooms as One Flooring System
The presence of a single flooring type, or at least one that uses the same plank throughout, is a huge aid in giving a home a more open feel, especially when considering connected rooms like the kitchen/dining combo or the living room/dining combo. Changes in flooring material require transition strips, which are used in every renovation regardless of an individual’s desire to avoid them.
The more of them present in a space, the more choppy and less thought out the finished work is apt to look. T-molding is used in transitions between two equal-height floors while reducer molding is used in conjunction with lower profile flooring (ex: tile to a thinner planked vinyl plank).
An eye should be given to where transition strips are going to be needed before installation begins, as retrofitting one in at a later date requires some unattractive cutting due to the nature of most planks.
Check the Subfloor Before Installation
Floating floors are a good option for most renovations due to the forgiving nature of the tongues and grooves, but they’re incredibly unforgiving when it comes to laying on carpet or tile. The uneven nature of a subfloor is often exaggerated when a floating floor is installed, making imperfections far more apparent.
Concrete subfloors are often inspected for moisture and cracks before a tile installation can commence while wood subfloors are inspected for levelness before any wood installation can begin. Older flooring is usually not left in place if a new version is going to replace it.
Subfloor leveling or replacement is often a huge expense, accounting for anywhere from 10-20% of the overall cost of a flooring renovation, and it’s the single aspect that’s forgotten by nearly every homeowner when the budget is being planned out. One should get an estimate of the cost beforehand when considering a floor renovation rather than after a large amount of time has been spent shopping at a local flooring store.
Another consideration for homeowners considering hardwood or laminate is the acclimation period, where the flooring is allowed to sit in the house before installation so that it can adjust to the local environment. Skipping this step will often result in expansion gaps or buckling (flooring coming off the subfloor) as the wood expands (from humidity) or contracts (from dryness). This step is often overlooked by DIYers with devastating results.
According to the National Association of Realtors, 91% of buyers prefer homes with hardwood flooring (2018 Remodeling Impact Report). It’s the reason why many homeowners request the material regardless of the room, despite the drawbacks already outlined. In short, it’s the most sought-after option for renovation and is worth considering on a room-by-room basis.
See Flooring Samples in Your Own Space
Showroom photos and lighting are two reasons why a flooring choice might look wonderful at the time of purchase but end up disappointing in the buyer’s home afterwards
Ordering samples of ones’ top choices and seeing them in the space is an important step in the process that should never be overlooked. One should spend time examining the samples in different lighting throughout the day and make sure the best options don’t disappoint on the home front. After choosing finalists, a few days should be spent considering the options before committing.
Pet owners can use that time to make sure one’s hardwood of choice won’t show damage from pet accidents, while more active homeowners can eliminate less durable options from the list of consideration. They should also be sure to avoid higher sheen options for high-traffic areas.
These are all practical matters that narrow the selection without regard to the individual’s personal preferences at the time of selection. After that, the shopping can begin in earnest with the power to choose from competing suppliers and avoid the pitfalls of the showroom.
Check the Plumbing Before the Subfloor Goes Down
The one trade most homeowners forget to consult during flooring planning is the plumber, yet a new floor can bury access to lines that run beneath a slab. If a kitchen or bathroom is on the renovation list, it pays to confirm there are no slow leaks or soft spots under the subfloor before anything permanent gets laid over them. Calling in a trenchless plumber at this stage makes sense because that kind of work locates and repairs lines without tearing up the slab you just prepared, and firms doing slab leak detection can trace a hidden leak to within a few feet before any demolition. Catching a cracked supply line now costs far less than lifting a finished hardwood floor to reach it six months later. It also lets the installation sequencing account for any repair work rather than colliding with it mid-project.
These seven considerations should be made before flooring installation begins so that the remainder of a home renovation can be conducted with confidence and efficiency.

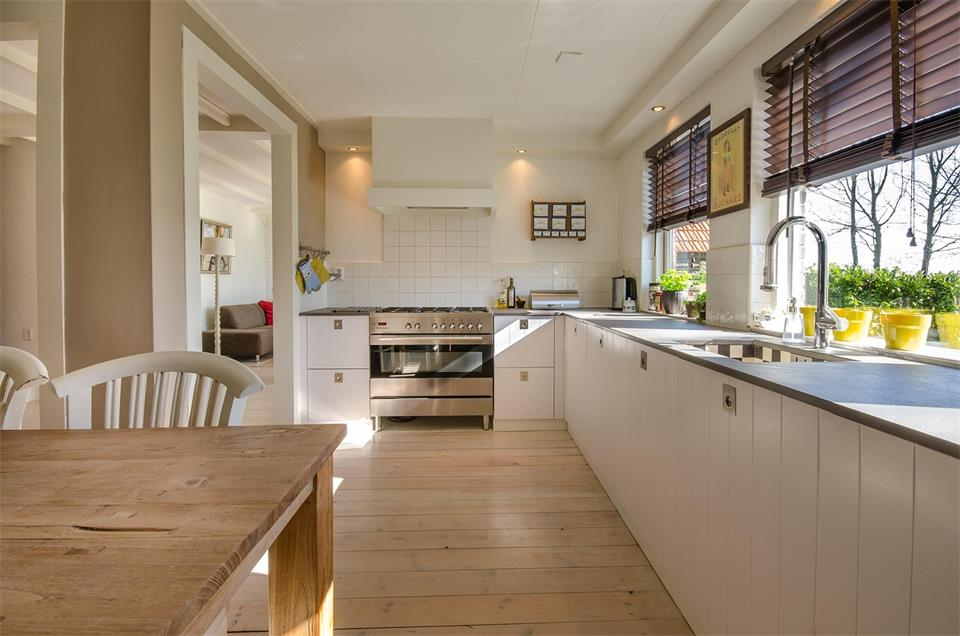
An automatic ice maker is one of those modern kitchen conveniences that you easily take for granted – until it suddenly stops working. Whether you are hosting a family gathering, preparing refreshing drinks on a hot summer afternoon, or managing a busy household, a broken ice machine can cause immediate inconvenience.
When your appliance stops delivering a steady supply of ice, searching for reliable ice maker repair near me allows you to connect with local specialists who can diagnose and resolve the issue quickly. Understanding the common causes behind ice maker failures can help you take fast action and restore comfort to your kitchen.
Common Ice Maker Problems
Residential ice makers are delicate mechanical and thermodynamic systems that rely on a precise balance of water flow, freezing temperatures, and electrical timing. Over time, heavy daily use can lead to several noticeable performance issues:
- No Ice Production. The machine runs but fails to produce any ice whatsoever, leaving the storage bin completely empty.
- Small or Cloudy Ice. The produced cubes are thin, hollow, or unusually cloudy, which typically indicates a restricted water flow or poor water filtration.
- Water Leaking. Water pools inside the freezer compartment or leaks out onto the kitchen floor, risking structural damage to your cabinetry and subflooring.
- Strange or Loud Noises. The unit emits loud clicking, grinding, or buzzing sounds during its harvesting cycle, pointing to mechanical strain or worn-out gears.
- Slow Production Speed. The ice maker takes an excessively long time to drop a single batch of cubes, failing to keep up with daily household demands.
- Ice Clumping. Produced ice melts slightly and freezes together into a solid, unusable block inside the storage bin, indicating erratic freezer temperatures.
Possible Causes of Ice Maker Failure
When an ice maker stops working correctly, the root cause can usually be traced back to a few specific mechanical or plumbing components. One of the most common culprits is an interrupted water supply line, which can become kinked, pinched, or disconnected behind the refrigerator.
Over time, an old, clogged water filter can become heavily restricted, severely reducing the water pressure reaching the appliance.
Inside the freezer, a frozen water inlet line can completely block water from entering the mold. Additionally, a faulty water inlet valve can fail to open electrically, while broken infrared bin sensors or mechanical shut-off arms can falsely signal to the control board that the bin is full.
Finally, internal mechanical failures, such as a burned-out ejector motor or cracked mold coatings, can stop the harvesting cycle entirely.
Why Professional Ice Maker Repair Is Better Than Guesswork
Attempting to fix an integrated ice maker without proper technical training often leads to further appliance damage and unnecessary repair expenses.
Because these units are deeply connected to both your home’s plumbing framework and the refrigerator’s internal electrical network, a single mistake can result in hidden water leaks or shorted control boards.
A professional technician possesses the advanced diagnostic instruments required to test water pressure, check voltage levels at the inlet valve, and inspect the complex mechanical assembly safely.
Relying on expert diagnostics ensures that the real cause of the malfunction is uncovered right away, bypassing hazardous guesswork and ensuring that all repairs comply with strict plumbing and electrical safety standards.
When to Search for Ice Maker Repair Near Me
While some minor kitchen issues can wait, certain situations demand a fast response from a qualified local service technician to prevent worsening property damage.
If you notice active water leaking from your refrigerator or inside the freezer liner, you should immediately turn off the water supply valve and contact a professional to avoid expensive floor rot.
Complete failure of the ice maker, recurring electrical errors, or persistent mechanical grinding sounds are also clear indicators that local same-day service is highly beneficial.
Partnering with a nearby specialist ensures that a technician can arrive at your doorstep quickly, equipped with the proper tools and factory-approved replacement parts to minimize your appliance’s downtime.
Fix Master LLC Ice Maker Repair Services
For homeowners dealing with unreliable ice machines throughout the Denver metropolitan area, Fix Master LLC provides exceptional, high-precision technical solutions.
The company specializes in servicing all major brands, configurations, and designs, including integrated refrigerator ice makers, under-counter units, and standalone ice machines.
The technicians at Fix Master LLC understand that appliance failures are highly disruptive, which is why they focus on rapid scheduling, punctual arrivals, and efficient on-site execution.
Backed by a transparent pricing structure and a strong customer-first approach, they provide clear upfront estimates and dependable repairs, completely eliminating hidden fees or unresolved technical issues.
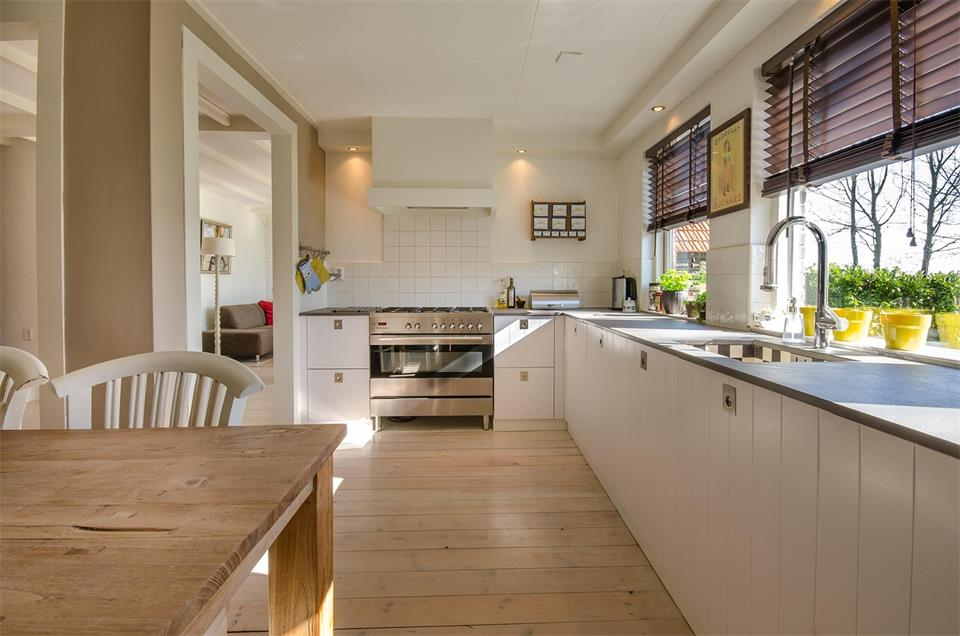
A kitchen remodel is one of the most rewarding home improvement projects you can take on. It not only refreshes one of the most-used spaces in your home but can also add substantial value to your property.
However, it’s also one of the easiest projects to go over budget on if you’re not careful. Between new appliances, custom cabinetry, countertops, and labor costs, expenses can add up quickly. The good news? With careful planning and a clear strategy, you can bring your dream kitchen to life without financial stress.
1. Start with a Realistic Budget
The first step in any successful kitchen remodel is setting a realistic budget. Begin by evaluating how much you can comfortably spend, then break that total into categories such as cabinets, appliances, flooring, lighting, and labor.
A good rule of thumb is to allocate around 40% of your budget to cabinetry, as it often has the most impact on the kitchen’s function and design. Always include a 10–15% contingency fund for unexpected costs—because in remodeling, surprises are inevitable.
2. Define Your Priorities Early
Before diving into design details, decide which elements of your kitchen remodel matter most. For some homeowners, it’s about expanding storage space or upgrading to custom cabinets.
For others, it’s about improving lighting, adding an island, or replacing outdated appliances. Identifying your “must-haves” early helps prevent costly changes later in the project and ensures that your spending aligns with what truly enhances your lifestyle.
Equally important is prioritizing the involvement of qualified professionals. Their expertise ensures that every upgrade, from electrical work to structural changes, is handled safely, efficiently, and to a high standard. Making professional guidance a priority not only improves the quality and longevity of your remodel but also protects you from avoidable risks and expensive rework. For example, hiring a certified Charlotte electrician, or a qualified expert in your area, ensures that new lighting or electrical components are installed correctly, safely, and in accordance with local building codes.
3. Choose Quality Where It Counts
It’s tempting to cut corners to save money, but certain areas of a kitchen remodel—such as cabinetry and countertops—should be viewed as long-term investments. Quality materials not only last longer but also elevate the entire look and feel of your space.
For instance, custom cabinets are built to fit your kitchen perfectly and can maximize storage efficiency while maintaining a timeless appearance. Investing in durability upfront often saves money on repairs or replacements down the road.
4. Balance Style with Function
A beautiful kitchen isn’t just about aesthetics—it’s about how well it works for your daily life. When planning your remodel, think carefully about the kitchen layout. Keep the “work triangle” (the relationship between your stove, sink, and refrigerator) in mind for efficient movement.
Incorporate storage solutions like pull-out drawers, lazy Susans, and built-in organizers to reduce clutter. A well-designed kitchen can be both stylish and practical, ensuring you get full value from every design decision.
5. Plan the Remodel in Phases
If your dream kitchen remodel feels out of reach financially, consider tackling it in phases. Start with foundational elements like cabinetry and layout adjustments, then move to cosmetic updates such as lighting, backsplashes, or new flooring as your budget allows.
A phased approach spreads out the financial load while still keeping progress steady toward your ideal kitchen.
6. Work with Experienced Professionals
Even the best DIY plans can fall short without expert guidance. Working with experienced designers, cabinet manufacturers, and contractors helps you avoid common mistakes and ensures that your kitchen remodel meets both aesthetic and functional goals.
Professionals can also help you identify areas where you can save money without compromising on quality—whether that’s selecting alternative materials, optimizing your space, or refining your layout for better efficiency.
7. Don’t Overlook the Small Details
Hardware, lighting fixtures, and finishing touches might seem minor, but they can have a big impact on the final look of your kitchen.
Choose handles and knobs that complement your cabinet style, and incorporate lighting that enhances the mood and usability of the space. These details tie your remodel together and make your kitchen feel polished and cohesive.
Final Thoughts
A kitchen remodel is a chance to create a space that reflects your personal taste while improving functionality for everyday life. Staying on budget doesn’t mean sacrificing style—it just requires careful planning, smart material choices, and clear priorities.
By taking the time to plan thoughtfully and work with skilled professionals, you can enjoy a stunning kitchen that enhances both your home’s value and your daily routine.

Making your home safer and more energy efficient doesn’t have to mean spending a fortune on complicated systems or major renovations. Some of the most effective improvements are surprisingly straightforward and can tackle both goals at the same time.
The key is focusing on upgrades that give you multiple benefits rather than trying to solve every problem with separate solutions.
Many homeowners think about security and energy efficiency as completely different issues, but they’re actually connected in more ways than most people realize. For example, maintaining a well sealed home can protect against drafts as well as ensure your internal systems aren’t overworked. When these systems fail during a peak season, having a plan for emergency air and heat can become an important part of your home’s safety net, as extreme indoor temperatures can pose a risk to vulnerable family members. The same features that keep intruders out often help keep heat and air conditioning in. The upgrades that reduce energy bills frequently improve your home’s overall safety and security, too.
Doors and Windows That Do Double Duty
Your home’s exterior doors and windows are your first line of defense against both energy loss and security threats. Old, poorly fitted doors and windows let conditioned air escape while providing easy access points for burglars. Upgrading these features addresses both problems with a single investment.
Garage doors often get overlooked in home security and energy planning, but they’re actually huge factors in both areas. An insulated garage door helps maintain temperature in attached garages, which reduces the load on your home’s heating and cooling systems.
Modern garage doors also come with advanced locking mechanisms and smart technology that makes them much more secure than older models.
AllStyle Garage Doors & Window Shutters and similar professional installation companies understand how to select and install doors and shutters that maximize both security and energy benefits. They know which materials and features provide the best combination of insulation, durability, and security for different home types and budgets.
Window shutters serve multiple purposes that make them excellent investments for security-conscious homeowners. They provide an extra barrier against break-ins while offering superior insulation compared to standard window treatments.
Quality shutters can reduce heat gain in summer and heat loss in winter while giving you complete control over privacy and natural light.
Entry doors deserve special attention because they’re used constantly and face the most security threats. Solid core doors with quality deadbolts and reinforced frames provide excellent security.
Energy-efficient doors with proper weatherstripping and insulated cores help maintain indoor temperatures while reducing drafts that make heating and cooling systems work harder.
Smart Technology That Saves Money and Increases Safety
Home technology has gotten pretty cool lately, and a lot of it helps with both saving money and keeping your place secure. Smart thermostats are probably one of the best investments you can make.
They learn when you’re home and when you’re not, then automatically adjust the temperature so you’re not heating or cooling an empty house. You can also control them from your phone, which is handy when your plans change and you’re coming home earlier or later than usual.
Smart door locks are another game changer. No more worrying about lost keys or wondering if someone made copies. You can give temporary codes to repair people or house sitters, and many models automatically lock themselves, so you don’t have to remember. While standalone gadgets can be a great start, the most effective security comes from a centralized system where your locks, cameras, and lighting communicate as one. Partnering with a certified Control4 dealer for your home can allow you to move beyond basic DIY devices and create custom automation scenes. Professionals can ensure that your network is strong enough to handle high definition video streaming and remote access without lag. The battery-powered ones are great because you don’t need an electrician to install them.
Motion lights are one of those simple things that make a huge difference. They scare off potential intruders by lighting up dark areas, but they also save energy because they’re only on when someone’s actually there. As homeowners place more focus on both security and atmosphere, interest in custom lighting design in New York City and similar services elsewhere has continued to grow, especially for creating outdoor lighting setups that feel both practical and visually appealing. LED motion lights barely use any electricity and last forever, while solar options are even more convenient since you don’t have to worry about wiring them up.
Smart garage door openers give you peace of mind that older systems can’t match. You can check from anywhere whether your garage door is closed, which is great when you’re lying in bed wondering if you remembered to close it. Some models will automatically close the door if you forget, and many have battery backup so they work even during power outages.
Insulation Improvements That Enhance Security
Good insulation doesn’t just cut your energy bills – it makes your home more comfortable and secure too. Houses with proper insulation maintain steady temperatures, so your heating and cooling systems don’t have to work as hard, and you don’t get those hot and cold spots that make rooms uncomfortable.
Attic insulation is usually your best bang for the buck. Proper insulation up there can cut your heating and cooling costs by 20% or more. It also prevents ice dams and moisture problems that can mess up your house’s structure. Plus, modern insulation materials help block noise, so your house stays quieter.
Wall insulation is trickier to add after your house is built, but if you’re doing any renovation work, it’s a great time to beef up what you have. You can blow insulation into existing walls without tearing everything apart, or go all out with fancy new systems if you’re doing major construction.
Don’t forget about basements and crawl spaces. Insulating these areas stops energy from leaking out while preventing moisture problems that lead to mold and structural damage. Getting rid of moisture also eliminates the damp conditions that attract bugs and create health problems.
Outdoor Improvements That Work Around the Clock
What you do with your yard can either help or hurt your home’s security and energy efficiency. Planting trees in the right spots gives you natural air conditioning that cuts your cooling costs while creating privacy barriers. Deciduous trees work great on the south and west sides because they provide shade in summer but let sunlight through in winter.
Water management around your foundation is crucial for preventing problems that can damage your insulation and create weak spots in your home’s security. Good drainage, proper grading, and gutters that actually direct water away from your house protect your investment and keep basement and crawl space areas dry.
Outdoor lighting needs to be planned right to serve multiple purposes. Good lighting eliminates hiding spots for potential intruders while making it safe to walk around your property at night. LED fixtures cost way less to operate than old-style lights and provide much better illumination.
Fences and privacy screens boost security while potentially helping with energy costs by blocking wind and creating little microclimates around your house. Solid fences can reduce wind infiltration, and strategic placement of screens can redirect breezes to help with natural ventilation when the weather’s nice.
Maintenance That Protects Your Investment
Regular upkeep keeps both your security and energy features working right while making them last longer. Simple stuff such as cleaning gutters, checking weatherstripping, and testing your security systems prevents small problems from turning into expensive repairs.
Having a seasonal maintenance routine helps keep everything running smoothly. Spring might be when you test your air conditioning and check doors and windows for winter damage. Fall could focus on heating system maintenance and replacing batteries in security devices. For example, services like water heaters services can be scheduled alongside HVAC checks to ensure all essential systems are functioning efficiently and safely throughout the year.
Professional inspections catch things you might miss while making sure your security and energy systems work well together. Energy audits show you where improvements would give you the biggest return on investment, while security assessments point out weak spots that need attention.
Getting the Most From Your Upgrades
The best home improvements tackle multiple problems at once instead of just fixing one thing. Features that make your home more secure, more energy efficient, and more comfortable give you the most value while making your place nicer to live in.
Planning your projects strategically helps you get more bang for your buck while keeping costs under control. Some improvements work better when done together, which lets you share installation costs and avoid having contractors tearing up your house multiple times.
Good installation makes all the difference between improvements that keep working for years and ones that create new headaches. Professional installation ensures everything works the way it’s supposed to while avoiding problems that mess up the effectiveness or create issues down the road.

How Digital Asset Businesses Can Strengthen Compliance and Financial Reporting

How Employee Well-Being Supports Productivity and Long-Term Business Performance

A First-Timer’s Guide to Using HubSpot as a Real Estate CRM

Digital Transformation for Physical Spaces: A New Approach

Digital Readiness: Future-Proofing Your Business Operations

125 Inspirational Car Quotes and Captions to Celebrate Your New Car

188 Deep Hurt Quotes with Images

148 Romantic Love Quotes for Her from the Heart

164 Relationship Goals Quotes for New Couples Expecting a Long Lasting Relationship

185 Cute Boyfriend Quotes for the Guy You Love
-
 Quotes6 years ago
125 Inspirational Car Quotes and Captions to Celebrate Your New Car
-
Growth6 years ago
188 Deep Hurt Quotes with Images
-
Quotes6 years ago
148 Romantic Love Quotes for Her from the Heart
-
Quotes5 years ago
164 Relationship Goals Quotes for New Couples Expecting a Long Lasting Relationship
-
Quotes6 years ago
185 Cute Boyfriend Quotes for the Guy You Love
-
Quotes6 years ago
141 Best Heart Touching Quotes about Love, Life, and Friendship
-
Quotes5 years ago
134 Time Flies Quotes for the Unforgettable Moments
-
Quotes5 years ago
122 Inspirational Kite Quotes That’ll Make You Wanna Fly Right Now