
Lifesytle
Simple Ways Parents Can Create a Calmer Bedtime Routine


If you’re a parent, you know the feeling. The sun has set, the day is winding down, and you’re dreaming of a quiet evening. But your little one has other plans. Bedtime can quickly turn from a peaceful transition into a nightly battle of wills, leaving everyone exhausted and frustrated.
The good news is that creating a calmer, more predictable bedtime doesn’t require a magic wand. With a few simple adjustments, you can transform your evening routine into a positive and connecting experience for the whole family.
Set a Consistent Bedtime and Stick to It
The single most effective tool in your bedtime toolkit is consistency. Children’s bodies, just like adults’, run on an internal clock, also known as a circadian rhythm. Going to bed and waking up at roughly the same time every day helps regulate this clock, making it easier for your child to feel sleepy when it’s time for bed.
Choose a bedtime that ensures your child gets enough sleep for their age and that works for your family’s schedule. Once you set that time, aim to stick to it, even on weekends. Of course, life happens, and special occasions will disrupt the schedule. But if you can maintain the routine 80% of the time, you’ll build a strong foundation.
A predictable schedule provides a sense of security for children; they thrive when they know what to expect. Many experts agree that one of the keys to successful bedtime routines is this very consistency. It signals to your child’s brain and body that the day is ending and sleep is approaching.
Create a Soothing Sleep Environment
A child’s bedroom should be a sanctuary for sleep, not a playroom that happens to have a bed in it. The environment itself can either promote rest or stimulation. Start by making the room as dark as possible.
Blackout curtains are a great investment to block out streetlights or the early morning sun. A cool room temperature, typically between 68 and 72 degrees Fahrenheit, is also ideal for sleeping.
Next, focus on comfort. Make sure their pajamas are soft and right for the season. The bed itself should be an inviting place. For younger children who have transitioned out of a crib, making their “big kid” bed feel special is key. This might include a favorite stuffed animal or a cozy blanket.
As they grow, you might consider introducing comfort items like toddler pillows, which are designed specifically for their smaller frames to provide support without straining their neck.
A quiet space is also important, so consider a white noise machine to drown out household sounds or traffic. The goal is to create a space that communicates one thing: this is where we rest.
Wind Down with Screen-Free Activities
In our hyper-connected world, it’s tempting to let kids watch a show or play a game on a tablet to wind down. However, the blue light from screens can mess with the body’s production of melatonin, the hormone that controls the sleep-wake cycle. Experts often recommend ending all screen time at least one to two hours before bed as part of a good nighttime routine.
Instead, replace screen time with calm, connecting activities. This transition period is crucial for helping a child’s active mind and body slow down. Some wonderful screen-free options include reading books together, doing a simple jigsaw puzzle, listening to calming music or an audiobook, drawing or coloring, or telling stories to each other about your day.
These activities not only avoid the stimulating effects of screens but also provide a valuable opportunity for quality time and connection before you say goodnight. It reinforces the feeling of safety and love, which is essential for a peaceful slumber.
Introduce Calming Rituals
Rituals are powerful because they are predictable sequences that signal what’s coming next. A consistent set of calming activities before bed can be an incredibly effective way to prepare your child for sleep. These rituals don’t need to be complicated or time-consuming. The key is to do them in the same order every night.
A warm bath is a classic for a reason. The slight drop in body temperature after getting out of the tub naturally helps induce sleepiness. Following the bath with a gentle lotion massage can be another soothing step.
Other families might incorporate a few minutes of quiet stretching or sing the same lullabies each night. The specific actions are less important than the repetition.
When you create a calm bedtime, you’re building a series of sleep cues for your child. After a few weeks of consistency, just starting the first step of the ritual, like running the bathwater, can trigger a sleepy response.
Offer a Simple, Healthy Bedtime Snack
The “I’m hungry” stall tactic is a classic that most parents know well. Sometimes it’s a genuine need, as a rumbling tummy can easily disrupt sleep. Incorporating a small, healthy snack into your bedtime routine can head off this issue before it starts. This shouldn’t be a large meal or a sugary treat, which can have the opposite effect and be overstimulating.
Think of it as a “sleepy snack.” Good options include foods that contain tryptophan, an amino acid that helps the body produce melatonin. A small glass of warm milk, a few slices of banana or apple, a handful of whole-grain crackers, or a small bowl of oatmeal are all good choices.
Offer the snack in the kitchen about 30 minutes before bed, and make sure tooth-brushing is the very next step in the routine. This prevents them from using hunger as an excuse to get out of bed later. It’s one of the simple things to include in their bedtime routine that can make a big difference.
Establishing a peaceful bedtime routine is more about consistency and connection than it is about perfection. There will be nights when things go off track, and that’s okay. The goal is to create a predictable, loving framework that helps your child feel secure and ready for rest, setting them up for a great night’s sleep and a happy morning.

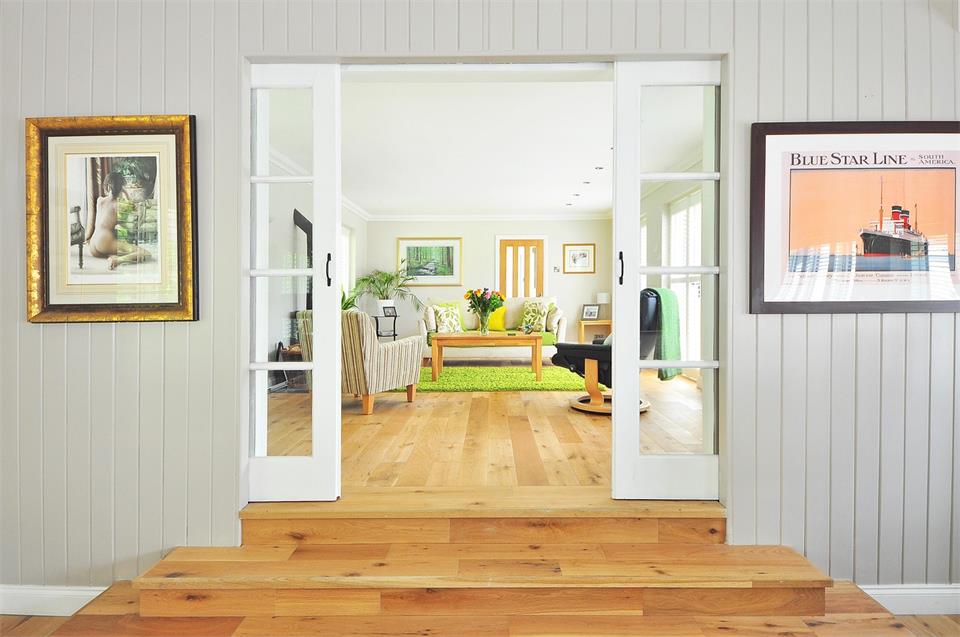
Many homeowners select flooring on the same basis they choose their paint: a showroom tour followed by the proclamation, “That’s nice. I’ll take it!” The issue with that strategy is flooring decisions have downstream implications on cabinet height, door clearances, subfloor prep, and installation sequencing. In other words, flooring decisions must be finalized before the tear-out begins, lest you pay twice for the same material.
Entryways Need Flooring That Can Take the Abuse
Every renovation has to start somewhere, and in this case should start at the entrance to the property. Entryways and mudrooms get hit with water, tracked dirt, dropped keys, and pet business on a daily basis. As such, a solid hardwood is out as an option due to its susceptibility to moisture and general fragility in the face of heavy traffic.
Porcelain tile or rigid core luxury vinyl plank are much better options for the high-traffic, high-moisture area as both can resist the effects of water damage and are available in wood-look patterns for those desiring to extend a flooring design throughout a home.
Slip resistance in the entry is a huge concern as well, which is why one should examine the coefficient of friction (COF) of any tile being considered for the space. The showroom may make a tile look luxurious and inviting, but it can turn into something of a hazard as soon as it gets wet
If one is considering extending a hardwood floor into an entry, it’s best to stop at a transition strip and then start the next flooring option at the threshold near the front door.
Kitchens Need Flooring Built for Spills and Traffic
After all, kitchens are the grease pits of the home. Whether it’s spilled liquid, greasy splashbacks from the stove, or the dog learning that the kitchen is the perfect place to relieve himself, the kitchen floor is going to endure more than any other room in the house. The kitchen also serves as the thoroughfare to all parts of the house, meaning the floor needs to handle heavy foot traffic in addition to whatever else is dumped on it.
The characteristics to consider when choosing a flooring material for the kitchen are similar to those of the entry in that the floor needs to resist water damage and have a non-slick surface for safety, especially for those in the household with mobility concerns. Porcelain tile and rigid core luxury vinyl plank are much better options for a kitchen due to their resistance to water, stains, and dents.
With vinyl, an eye should be kept on the thickness and clear coat of the top-wear layer (measured in mils), as a lower than 12 mil thickness can lead to excessive scratches and gouges in the flooring. Laminate is tempting in a kitchen scenario because of the lower cost and visual appeal, but it’s a poor choice for the increased likelihood of damage around standing water (the seams can swell if the flooring gets wet).
The core layer of laminate flooring is basically sponge which can retain water, a problem especially around a dishwasher or washing machine.
Bathrooms Put Waterproofing First
It’s rare for a homeowner to choose a bathroom floor based on aesthetics, and it should be rare for a contractor to advise someone to choose a bathroom floor based on aesthetics.
The short version of this is that the bathroom is where water-vulnerable floors get their comeuppance, and as such it’s a good idea to select a durable and easy-to-clean option for the space.
The long version speaks to the reality that a bathroom is the single most humid room in the house, and as such it’s likely to see both accidental spills and water accumulation underneath the toilet if the sealant around it fails (the same goes for around the shower/tub).
The top recommendation for a bathroom floor is porcelain tile installed over a waterproof membrane, as it’s about as close to totally waterproof as one can get with floor covering. However, it’s a cold, hard option for those uninterested in the feel of a five-year-old concrete basement at the end of every day.
Waterproof vinyl plank can be an excellent second choice material for a bathroom (avoid peel-and-stick varieties), as it too is totally waterproof but with the benefit of being more pleasant to bare feet. It’s important to note that any vinyl plank installed in a bathroom should be of the rigid core variety as the flexible planks can easily be lifted at the seams like traditional tongue-and-groove laminate.
Avoid installing either solid hardwood or traditional laminate in a bathroom, as the seams will absorb water and cause swelling. If tile is chosen as the material, time should be allocated to sealing the grout, an oft-overlooked maintenance task. Failure to properly seal bathroom grout is often the reason a five-year-old bathroom floor looks ten years old.
Bedrooms Reward Comfort Underfoot
A plush, cozy floor is the stuff of relaxation in the bedroom, and the feel of it under bare feet after a long day is unmatched. For those unfortunate enough to live in a house where the climate can’t support a beach-house year-round existence, the softness and warmth of a thick carpet are even more appealing.
That doesn’t mean that other flooring options can’t be employed to similar effect, though, especially if the homeowner has allergies and finds that the carpet fibers hold onto pet dander and dust too easily. Hardwood paired with an area rug can offer the same softness without the allergen consequences for some.
Frieze and berber carpets are much harder wearing than plush variants, though, so one should be aware that berber has a lower comfort factor than plush and is more of a traffic floor than a cozy retreat.
The common areas (living room, family room, great room, etc.) tend to benefit most from prefinished distressed hardwood, especially if the space sees a fair amount of foot traffic from kids, dogs, and/or grandparents. Prefinished floors are best in these rooms as the finish will help resist the effects of heavy traffic and power cleaning (both of which are necessary for a space regularly used by a large number of people).
Prefinished flooring in a kitchen is also an option, as long as one doesn’t have large dogs (who can cause dents in the wood during play). Prefinished flooring in the kitchen should avoid the possibility of water getting to the seams, however, as that can cause subfloor damage that may necessitate replacement of the entire flooring.
Oak tends to be the hardwood of choice for prefinished flooring due to its flexibility and forgiving nature. Maple is a harder wood and will show dents more easily, especially in the grain, and hickory has a much more rustic appearance. None of the three woods should be chosen in relative isolation from the rest of the house, as most common rooms are joined to the kitchen and/or entry in most residences, and the three areas need to have a degree of cohesion.
Basements are generally off-limits to solid wood due to the likelihood of moisture exposure at some point during the life of the installation. The options are limited mostly to engineered hardwood and vinyl plank, as both have a much lower likelihood of delamination and swelling.
Tile, too, is a viable option for a basement floor as it’s impervious to moisture concerns completely. Engineered hardwood is made up of alternating layers of solid hardwood and plywood for stability, which reduces, but doesn’t eliminate, the ability for the floor to swell due to moisture. Vinyl plank is totally moisture-resistant and won’t swell or delaminate in the face of water damage.
Tile is an option for a basement if the subfloor (concrete) has been appropriately tested for moisture and cracks, as it is completely waterproof. Radiant floor heating is also an option for basement renovations in particularly cold climates, but an eye should be kept on material restrictions for the heating choice (tile and vinyl can work; hardwood species are often ruled out)
Flooring Choices Affect Cabinets, Trim, and Appliance Clearances
This makes the choice of the floor covering one of the most difficult decision points in the remodeling process, as it’s a large expenditure with little leeway for error
If one goes with tile and decides later to change course and go with vinyl plank, post-cabinet installation, there’s a good chance that appliances like a dishwasher won’t fit in the same manner. It’s critical, when ordering cabinetry and trim, to bring blueprints and/or room measurements to a full-service supplier who can quote materials and installation timing for the entire house.
A company like Wylie Carpet & Tile has the ability to source samples, analyze them in relation to the home’s cabinetry/appliances, and plan out the build in such a way that flooring doesn’t slow down the project unnecessarily.
Rooms need to be considered in conjunction with one another rather than individually.
Plan Connected Rooms as One Flooring System
The presence of a single flooring type, or at least one that uses the same plank throughout, is a huge aid in giving a home a more open feel, especially when considering connected rooms like the kitchen/dining combo or the living room/dining combo. Changes in flooring material require transition strips, which are used in every renovation regardless of an individual’s desire to avoid them.
The more of them present in a space, the more choppy and less thought out the finished work is apt to look. T-molding is used in transitions between two equal-height floors while reducer molding is used in conjunction with lower profile flooring (ex: tile to a thinner planked vinyl plank).
An eye should be given to where transition strips are going to be needed before installation begins, as retrofitting one in at a later date requires some unattractive cutting due to the nature of most planks.
Check the Subfloor Before Installation
Floating floors are a good option for most renovations due to the forgiving nature of the tongues and grooves, but they’re incredibly unforgiving when it comes to laying on carpet or tile. The uneven nature of a subfloor is often exaggerated when a floating floor is installed, making imperfections far more apparent.
Concrete subfloors are often inspected for moisture and cracks before a tile installation can commence while wood subfloors are inspected for levelness before any wood installation can begin. Older flooring is usually not left in place if a new version is going to replace it.
Subfloor leveling or replacement is often a huge expense, accounting for anywhere from 10-20% of the overall cost of a flooring renovation, and it’s the single aspect that’s forgotten by nearly every homeowner when the budget is being planned out. One should get an estimate of the cost beforehand when considering a floor renovation rather than after a large amount of time has been spent shopping at a local flooring store.
Another consideration for homeowners considering hardwood or laminate is the acclimation period, where the flooring is allowed to sit in the house before installation so that it can adjust to the local environment. Skipping this step will often result in expansion gaps or buckling (flooring coming off the subfloor) as the wood expands (from humidity) or contracts (from dryness). This step is often overlooked by DIYers with devastating results.
According to the National Association of Realtors, 91% of buyers prefer homes with hardwood flooring (2018 Remodeling Impact Report). It’s the reason why many homeowners request the material regardless of the room, despite the drawbacks already outlined. In short, it’s the most sought-after option for renovation and is worth considering on a room-by-room basis.
See Flooring Samples in Your Own Space
Showroom photos and lighting are two reasons why a flooring choice might look wonderful at the time of purchase but end up disappointing in the buyer’s home afterwards
Ordering samples of ones’ top choices and seeing them in the space is an important step in the process that should never be overlooked. One should spend time examining the samples in different lighting throughout the day and make sure the best options don’t disappoint on the home front. After choosing finalists, a few days should be spent considering the options before committing.
Pet owners can use that time to make sure one’s hardwood of choice won’t show damage from pet accidents, while more active homeowners can eliminate less durable options from the list of consideration. They should also be sure to avoid higher sheen options for high-traffic areas.
These are all practical matters that narrow the selection without regard to the individual’s personal preferences at the time of selection. After that, the shopping can begin in earnest with the power to choose from competing suppliers and avoid the pitfalls of the showroom.
These seven considerations should be made before flooring installation begins so that the remainder of a home renovation can be conducted with confidence and efficiency.

High-performance gear is constantly evolving, from race cars to protective sports equipment. A focus on athlete safety has transformed design, moving away from simple one-size-fits-all gear. Today’s equipment is a sophisticated system for performance and protection, with ongoing efforts to advance player care at all levels.
This innovation is especially crucial in football. The helmet, once a basic piece of plastic and foam, has become a highly technical device.
Modern football helmet technology uses materials science, biomechanics, and data analysis to offer better protection than ever. Understanding these improvements helps parents, coaches, and players choose equipment that puts safety first. Let’s look at the main features that define a next-generation helmet.
Beyond the Shell: The Shift to Advanced Materials
For decades, standard helmet shells were made from polycarbonate, a tough plastic. Traditional designs often meant trading strength for weight, which can tire players and affect their form.
The new era of helmet design overcomes this with advanced materials that are both stronger and lighter. Engineers now use polymer blends and flexible outer shells that absorb and spread impact energy more effectively.
Instead of a rigid shell that sends force straight through, these materials can flex and bounce back, redirecting energy away from the head. A lighter, more advanced football helmet can make a real difference in comfort and endurance without sacrificing protection. This reduced weight helps players keep proper posture late in the game when fatigue sets in.
Smarter Impact Absorption Systems
While the outer shell is the first defense, the real innovation often happens inside. The padding in a next-generation helmet is far more than just foam. Modern helmets use sophisticated multi-layered systems designed to handle different types of impact forces. These include linear forces from a direct hit and rotational forces that twist the head.
Many advanced helmets now feature non-traditional padding structures like lattice-like grids made from elastomeric polymers. Manufacturers can tune these structures to compress and shift in multiple directions.
When an impact occurs, these internal components work together to slow down the forces and reduce the energy transferred to the head. Some designs also include fluid-filled pods or gel packs for an extra layer of cushioning.
The Importance of a Precision Fit
An ill-fitting helmet can’t offer the best protection. A loose helmet can shift during impact, while a tight one causes discomfort and distraction. Next-generation helmets solve this with highly customizable fitting systems that go beyond simple air bladders.
They often use interchangeable padding of different thicknesses for a custom fit around the crown, jaw, and back of the head.
Some manufacturers even use 3D scanning to map an athlete’s head for a truly bespoke fit. This customization ensures the helmet stays securely in place, allowing its protective systems to work as intended. A proper fit also affects an athlete’s confidence.
Studies have shown clear relationships between college football athletes and their equipment, where comfort and proper function play a role in their experience.
Data-Driven Design and Testing
Data is key to proving new helmet designs work. Helmet development is a science-driven field relying on extensive research and testing, not just trial and error.
Engineers use computer simulations and finite element analysis (FEA) to model how designs will perform under various impacts before building a physical prototype. Once created, prototypes undergo rigorous physical testing in labs that simulate on-field impacts.
Emerging helmet testing methods allow more accurate evaluations of how well a helmet reduces both linear and rotational forces. Some helmets are embedded with sensors during testing to collect real-time impact data that engineers use to refine their designs.
This cycle of design, testing, and analysis ensures each generation of helmets offers measurable improvement.
Ventilation and Athlete Comfort
While protection is the top priority, comfort and performance are closely linked. A hot and stuffy helmet can lead to early fatigue and decreased focus. Recognizing this, modern helmet designers have put a greater emphasis on ventilation. They use strategic vent placement and internal air channels to promote airflow, keeping the athlete cool and comfortable.
These airflow systems are often designed using computational fluid dynamics (CFD), the same technology used to optimize aerodynamics in airplanes and race cars. By creating channels that pull cool air in and push hot air out, these helmets can improve an athlete’s thermal regulation.
This focus on the complete user experience, balancing protection with practical comfort, is a hallmark of modern sports equipment. It ensures athletes can perform at their best, confident their gear is working with them.
Choosing the right equipment is a critical part of participating in any sport safely. As technology keeps advancing, the gear designed to protect athletes will only become smarter, lighter, and more effective. Looking for these key features helps you select a helmet that represents the best of modern innovation.

An automatic ice maker is one of those modern kitchen conveniences that you easily take for granted – until it suddenly stops working. Whether you are hosting a family gathering, preparing refreshing drinks on a hot summer afternoon, or managing a busy household, a broken ice machine can cause immediate inconvenience.
When your appliance stops delivering a steady supply of ice, searching for reliable ice maker repair near me allows you to connect with local specialists who can diagnose and resolve the issue quickly. Understanding the common causes behind ice maker failures can help you take fast action and restore comfort to your kitchen.
Common Ice Maker Problems
Residential ice makers are delicate mechanical and thermodynamic systems that rely on a precise balance of water flow, freezing temperatures, and electrical timing. Over time, heavy daily use can lead to several noticeable performance issues:
- No Ice Production. The machine runs but fails to produce any ice whatsoever, leaving the storage bin completely empty.
- Small or Cloudy Ice. The produced cubes are thin, hollow, or unusually cloudy, which typically indicates a restricted water flow or poor water filtration.
- Water Leaking. Water pools inside the freezer compartment or leaks out onto the kitchen floor, risking structural damage to your cabinetry and subflooring.
- Strange or Loud Noises. The unit emits loud clicking, grinding, or buzzing sounds during its harvesting cycle, pointing to mechanical strain or worn-out gears.
- Slow Production Speed. The ice maker takes an excessively long time to drop a single batch of cubes, failing to keep up with daily household demands.
- Ice Clumping. Produced ice melts slightly and freezes together into a solid, unusable block inside the storage bin, indicating erratic freezer temperatures.
Possible Causes of Ice Maker Failure
When an ice maker stops working correctly, the root cause can usually be traced back to a few specific mechanical or plumbing components. One of the most common culprits is an interrupted water supply line, which can become kinked, pinched, or disconnected behind the refrigerator.
Over time, an old, clogged water filter can become heavily restricted, severely reducing the water pressure reaching the appliance.
Inside the freezer, a frozen water inlet line can completely block water from entering the mold. Additionally, a faulty water inlet valve can fail to open electrically, while broken infrared bin sensors or mechanical shut-off arms can falsely signal to the control board that the bin is full.
Finally, internal mechanical failures, such as a burned-out ejector motor or cracked mold coatings, can stop the harvesting cycle entirely.
Why Professional Ice Maker Repair Is Better Than Guesswork
Attempting to fix an integrated ice maker without proper technical training often leads to further appliance damage and unnecessary repair expenses.
Because these units are deeply connected to both your home’s plumbing framework and the refrigerator’s internal electrical network, a single mistake can result in hidden water leaks or shorted control boards.
A professional technician possesses the advanced diagnostic instruments required to test water pressure, check voltage levels at the inlet valve, and inspect the complex mechanical assembly safely.
Relying on expert diagnostics ensures that the real cause of the malfunction is uncovered right away, bypassing hazardous guesswork and ensuring that all repairs comply with strict plumbing and electrical safety standards.
When to Search for Ice Maker Repair Near Me
While some minor kitchen issues can wait, certain situations demand a fast response from a qualified local service technician to prevent worsening property damage.
If you notice active water leaking from your refrigerator or inside the freezer liner, you should immediately turn off the water supply valve and contact a professional to avoid expensive floor rot.
Complete failure of the ice maker, recurring electrical errors, or persistent mechanical grinding sounds are also clear indicators that local same-day service is highly beneficial.
Partnering with a nearby specialist ensures that a technician can arrive at your doorstep quickly, equipped with the proper tools and factory-approved replacement parts to minimize your appliance’s downtime.
Fix Master LLC Ice Maker Repair Services
For homeowners dealing with unreliable ice machines throughout the Denver metropolitan area, Fix Master LLC provides exceptional, high-precision technical solutions.
The company specializes in servicing all major brands, configurations, and designs, including integrated refrigerator ice makers, under-counter units, and standalone ice machines.
The technicians at Fix Master LLC understand that appliance failures are highly disruptive, which is why they focus on rapid scheduling, punctual arrivals, and efficient on-site execution.
Backed by a transparent pricing structure and a strong customer-first approach, they provide clear upfront estimates and dependable repairs, completely eliminating hidden fees or unresolved technical issues.

Digital Readiness: Future-Proofing Your Business Operations

From Onboarding to Upskilling: Building Corporate Training That Works

The Psychology of Space: How Floor Plan and Layout Impact Visitor Behavior at Trade Shows

The Evolution of Commercial Security: How IP-Based Systems are Replacing Legacy Hardware

How to Audit Your Current Engineering Workflows for Digital Readiness

125 Inspirational Car Quotes and Captions to Celebrate Your New Car

188 Deep Hurt Quotes with Images

148 Romantic Love Quotes for Her from the Heart

164 Relationship Goals Quotes for New Couples Expecting a Long Lasting Relationship

185 Cute Boyfriend Quotes for the Guy You Love
-
 Quotes6 years ago
125 Inspirational Car Quotes and Captions to Celebrate Your New Car
-
Growth6 years ago
188 Deep Hurt Quotes with Images
-
Quotes6 years ago
148 Romantic Love Quotes for Her from the Heart
-
Quotes5 years ago
164 Relationship Goals Quotes for New Couples Expecting a Long Lasting Relationship
-
Quotes6 years ago
185 Cute Boyfriend Quotes for the Guy You Love
-
Quotes5 years ago
141 Best Heart Touching Quotes about Love, Life, and Friendship
-
Quotes5 years ago
134 Time Flies Quotes for the Unforgettable Moments
-
Quotes5 years ago
122 Inspirational Kite Quotes That’ll Make You Wanna Fly Right Now